The Provident Homemaker
  • Recipes and Info
    • Making Bread
  • My Blog
  • Favorite Resources
  • Documents and Files
  • 52 Weeks of Building Storage

When only one of you can't have wheat

3/2/2013

2 Comments

 
Picture
Surely many of you are in the same boat.

Out of the eight of us in the house, we've learned that one child can't have wheat.  She's so sensitive that eating one 1/4" piece of bread caused her arms to turn hot pink and start to weep.  But the rest of us are fine.  We're still in the process of determining if she reacts to gluten, or to just the wheat itself, so for now everything must be wheat-free AND gluten-free.  And dairy-free, while we're figuring out if that's an issue too.  For some strange reason, I prefer to cook only one meal, per meal.  And special 'gluten-free' foods are pricey.  Really pricey.  So I'll let you know how I've adapted.  Hopefully it'll help you or someone else having to adapt to whatever allergy or special needs diet strikes just one or two in your family.  


Eight Tips for feeling (more) normal when someone has special dietary needs

1- Plan on preparing most of your family's foods.  
Unless you have nothing against quadrupling your family's food budget.  Not kidding.   If you didn't cook much before, brush up on the basics.  They'll do for now.  And for a while.

2- Eat naturally wheat-free foods
Keep a list around so you can focus on what CAN be eaten rather than all the CAN'Ts.  It's empowering and encouraging.  While you're still getting used to what's okay and not, go through your kitchen and pantry, and write down everything that is GF already, including all plain spices and herbs (blends might not be; check), canned/fresh/frozen fruits and vegetables, rice, plain beans, flax, buckwheat, meat in its natural state, eggs, peanut butter, olives, potato chips, popcorn, jam, ketchup...  See a bigger list here, halfway down the page.  There's a GF year-supply list here.  You know, I've been telling myself for years that we oughta eat more rice and beans.  They're cheap, store well, and are filling. 
Those have suddenly become more popular at my house.

3- Make a list of 10-15 meals your family likes that are gluten/wheat-free and can be made using what you typically have on hand.  Include both super-quick meals and more involved ones.  Be willing to spend about an hour doing this; it'll save you much more time than that in the long run.  Get input from your kids.  Tape the list someplace handy like the inside of your cooking supplies cupboard.  No more panic or feeling helpless at a change of dinner plans!

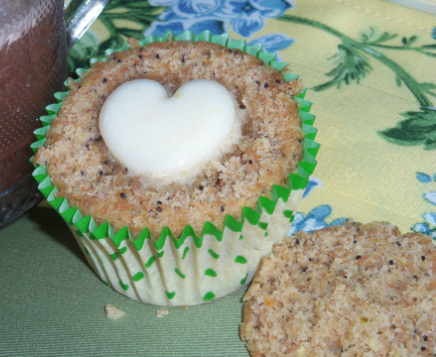
4- When you cook some specialty gluten-free food, go ahead and make a big batch.  Then freeze the rest in individual serving sizes.  For my 10-year-old, the ziptop "snack size" baggies are the perfect size.  There's a gallon-sized ziptop bag labeled for her in the freezer. What's in it changes often.  Right now it has GF waffles and breadsticks, spaghetti (made with specialty GF pasta) and sauce, seasoned rice, dairy-free homemade ice cream (made in my blender), and GF chocolate chip cookies.  Remember treats. They've saved my daughter from feeling deprived with all these new "don't"s.  Whenever my husband pulls out the ice cream, she pulls out her freezer bag and gets something sweet too.  I also keep one loaf of GF bread in the freezer, for sandwiches and toast.  She pulls out a couple slices whenever needed.

5- Keep a small plastic bin full of GF baking supplies, like the photo above. It's handy for all kinds of things. My 'essentials' include a bag of GF flour mix (homemade or storebought), xantham gum, some white flour like rice, tapioca, or potato starch, and a whole-grain GF flour like brown rice, lentil, oat, or sorghum.  Mine also has a bag of dairy-free chocolate chips in it, good for a lot more than just cookies.  I've found flours like tapioca, potato starch, and rice flour at the Asian market for a fraction of the price.

6- Try a new GF recipe at least once a week.  And maybe only once a week, depending on how overwhelming it is to you.  Have that other family member cook with you, so she'll learn to cook for herself later.  If you love bread, stick with the quickbreads for a while.  They're much simpler.  I think the easiest way to learn, other than just trying a new GF mix each week, is to buy a copy of of Living Without magazine.  Or sign up for their free weekly newsletter, which includes a recipe.   I love the magazine format because you can learn in 5-minute increments.

7- Remember to watch out for cross-contamination
I think this is actually the hardest one.  You might want to have TWO jars of mayonnaise and jam open, one of each labeled as GF.  Otherwise it's really easy for bread crumbs from one person to end up in the jar, where they'll cause the allergic person grief.  Remember that toasters carry crumbs.  Wipe the counters really well.  Consider having a second set of measuring cups, possibly mixing bowls and cooling racks too, depending on severity of reaction.  If you have a regular wheat grinder you can grind your own GF flours, using things like rice, beans, oats, lentils, quinoa, etc, BUT only use a mill that has not been used for wheat.  Unless you want to invite problems.  Some things can be ground in a blender, like oats, if those are OK for your family member.

And,
8- Read labels.  Always.  Always.
Learn which ingredients have hidden gluten.  You'll be surprised at what you find.  Sometimes good surprises.  Sometimes lame ones.  Realize too that sometimes companies change their ingredients, and something that didn't have gluten/wheat in it before, might the next time you buy it.  Knowing exactly what you're eating is a good idea anyway.


You can do this!  :D

Love, Rhonda
2 Comments

GF CF Chocolate Chip Cookies

2/19/2013

0 Comments

 
Picture
NOTE:  If wheat is not a problem for you (and it's not for me, that I know of...)  this recipe can be made using regular all-purpose flour.

I've been playing around with gluten-free foods for a while now, and sometimes the food is a   little disappointing.  Not so with these.  They were soft and chewy in the center, crispy on the edges, with good texture and flavor.  The recipe was adapted from two nearly-identical recipes from "Life Tastes Good Again" and from the box of SunFlour Mills gluten-free Pastry Flour.  The only thing was, the recipe called for butter and a box of vanilla pudding mix, both of which contain dairy.  Here's the gluten-free AND dairy-free version:

Soft and Chewy GF CF Chocolate Chip Cookies

1 cup dairy-free 'butter', like this recipe (or use real butter if you're OK with it)
3/4 c. packed brown sugar
1 c. granulated sugar
1/4 c. Ultra Gel (a no-cook food starch)
2 eggs
2 tsp. vanilla
2 1/4 c. gluten-free flour blend, like Sunflour Mills GF Pastry Flour  or whatever you prefer
1 1/2 tsp. xanthan gum (omit if using regular all-purpose flour)
1/4 tsp. salt
1 tsp. baking soda
2 c. chocolate chips (dairy free, gluten free) OR 1 c. each nuts and chocolate chips

Preheat oven to 375 degrees.   Cream together the butter, both sugars, and Ultra Gel (or pudding mix).  Beat in the eggs and vanilla.  Add 1 cup of the GF flour, the xantham gums, salt, and baking soda.  Beat until smooth, then mix in the remaining 2 1/4 c. GF flour.  Stir in chocolate chips and nuts if using them.

Drop by heaping tablespoonfuls onto an ungreased cookie sheet.  Bake about 7-9 minutes, or until just browned on the edges and centers still look wet.  Let cookies sit on cookie sheet for 4-5 minutes before removing to a cooling rack.  (They'll fall apart if you move them too soon.)  Makes about 30 cookies.   Store any extras in an airtight container at room temperature or in the freezer.
If you like cookies crispy, cook them until the centers look done.  If you want them chewy, it's critical to essentially underbake them a bit, hence the wet centers.  Baked goods continue to cook even after they come out of the oven. 

*If dairy is not a problem for you either, then you can use a box of instant vanilla pudding in place of 3/4 cup of the sugar, 1/8 tsp of the salt, 1 tsp. of the vanilla, and 1/4 c. Ultra Gel. 

0 Comments

Homemade Dairy-free Spreadable Butter

2/9/2013

12 Comments

 
Picture
Picture
My no-butter spread still tastes like butter plus is made with healthy fats. The spread is in the container; dairy butter is on the left for comparison.
I am so excited!

But first- if you've noticed a shift towards gluten-free and dairy-free recipes lately, good noticing!  I. Love. Dairy.  I even milked a cow every day as a teenager so I had the fresh great stuff.  But sometimes people have health problems with certain foods.  So far we've discovered that two of my children get stomach aches when they drink milk.  One of my daughters has excema on her arms that just has not cleared up.  It usually comes and goes, especially in the winter, but she's had it for two months straight.  So I've taken all dairy and wheat items out of her diet to see if those common allergens could be a reason for it.  I'm still cooking normally for everyone else, but have necessarily been experimenting with this other way of cooking.  And here's the latest and greatest:

Butter.  Sort of.  It tastes like it, anyway.  And spreads beautifully.  It even cooks like butter.  I've creamed it with sugar and made a cake, made brownies, melted it on muffins, spread on toast, made honeybutter, and made dairy-free cream of broccoli soup with it.  Yum.

The idea was sparked by reading a label on a small tub of honey butter.  Turns out there was no butter in it at all, but tasted as though it did.  Reading through the list- hydrogenated soybean oil, honey, citric acid, soy lecithin, artificial colors and flavors- it occurred to me that if THEY could make something taste and spread like butter, then maybe I could, too.  So I started researching what the flavor components were in butter and what other foods contain them too.  It was fun to read about- ketones, diacetyl, acetoin, reactions between aldehyde and niacin.  (But, dang it, how come if I was setting a good example of work, study, and loving to learn, I had to remind my daughter every 20 minutes to get back to her schoolwork?!)

Anyway, I found some foods that naturally have some of the same flavor components as butter, and used one that covered the bases.  It's the ingredient that makes ALL the difference in flavor here.  Liquid aminos.  Or just use soy sauce, which is about the same thing.  If you prefer to avoid soy completely, nutritional yeast flakes will give a similar flavor.  Vinegar also works, in the same tiny amount.  The cornstarch, coconut flour, or xantham gum thicken the water so it will better stay mixed with the oils.

This is spreadable when used straight from the fridge.  It’s fantastic on toast, muffins, and waffles.   It has about the same fat-to-water ratio as dairy butter (80:20).  You can cook with it just like real butter, too.  It can be creamed with sugar for cakes and cookies.  Use it cold from the fridge to do this, and don’t beat it longer than about 45 seconds or it begins to melt a little.  This spread can be mixed with an equal amount of honey to make honey butter.

If you’d like a firmer consistency, like sticks of butter, increase coconut oil to ¾ cup and reduce liquid oil to ¼ cup.

Turmeric and paprika give it a nice color without  affecting the flavor.  Turmeric adds bright yellow so a little goes a long way, and paprika lends a warm pinkish orange.  Both will deepen after a day. Combine a pinch of each (just under 1/16 tsp) for the best color.  If you make this using olive oil, the buttery spread has a greenish hint to it which paprika helps eliminate.

Dairy-free Buttery Spread

2 Tbsp. water
1 tsp.  cornstarch OR coconut flour OR 1/4 tsp. xantham gum
1/8 tsp. liquid aminos or soy sauce or vinegar OR scant ½ tsp. nutritional yeast
½ tsp. salt
A pinch each turmeric and paprika, optional (for color)
½ c. coconut oil, softened just til creamy and stirrable
½ c. olive oil or other liquid oil like canola

In a glass 1-cup measuring cup, stir together water and coconut flour.  Microwave until it boils, stir until smooth.  (You’ll need 3 T water if boiling this in a pan on the stove.) Mix in the liquid aminos, salt, turmeric and paprika.  Set aside to cool. 

After it’s cooled to nearly room temperature, mix in the coconut oil, then whisk in olive oil until smooth.  Put mixture in the fridge to chill.  Stir after it starts to thicken, about 15-30 minutes. 

Store covered in the refrigerator.  Makes just over 1 cup. (9 ½ oz, or 3 T. more than 2 sticks of butter)

If you want a firmer consistency to form “sticks” of butter, after it’s just started thickening in the fridge and you’ve stirred it, pack it into whatever molds you have.  I use mini loaf pans, filling them on a scale so each stick weighs 4 ounces.  Put in the freezer to solidify. After they’re hard, pop them out of the molds and store in ziptop bags or wrapped in plastic.  Label and keep in the freezer for longer storage, or keep in the fridge for shorter-term use.

Picture
12 Comments

Creamy Fruit Salad- CF

2/1/2013

0 Comments

 
Picture
One of my children is needing to avoid dairy for a while, but I found strawberries on sale and wanted a creamy salad using them.  Add some pudding?  Not an option.  Yogurt?  Nope. Whipped cream?   No, but... I had coconut cream.  The thick, creamy, good stuff you find at the top when you open a can of coconut milk.  So I used that.  It worked beautifully.  Everyone was happy.

It's super fast, too.  If you feel like making it fancier, you can whip chilled coconut cream (yes, it whips, just like dairy cream, but goes flat faster if it warms up).

Creamy (Dairy-free) Fruit Salad
1/2 pint fresh strawberries, hulled and sliced
2 bananas, peeled and sliced
1 apple, cored and chopped (I leave the peel on)
3 Tablespoons coconut cream
3 drops lime or orange essential oil, optional
2 Tablespoons shredded sweetened coconut

Combine fruit in a medium bowl.  In a small bowl, stir together the coconut cream and essential oil, until smooth.  Pour over fruit and stir gently to coat.  Sprinkle with coconut.
(If you like things sweet or if your strawberries are sour, add 1 Tbsp. honey to the coconut cream mixture
Serves 4-6


0 Comments

Dairy-Free, No-Cook Sweetened Condensed Milk

11/27/2012

0 Comments

 
Picture
This is a dairy-free version of sweetened condensed milk, using honey as the sweetener.  For some other ways to make a substitute for sweetened condensed milk, including some with dairy, see here. 
It doesn't need cooked, which not only makes it super fast to make, but is great if you want to use raw honey and keep the enzymes.
Due to the fiber in this recipe, it won't be as smooth as the store product, but it is still thick, creamy, and sweet. 

This has one rather obscure ingredient: coconut butter.  That, however, is super easy to make, and will store at room temperature for a long time.  Months, at least.  
Coconut butter is plain, unsweetened coconut ('macaroon coconut') that has been pureed in a blender or food processor for several minutes, until it becomes liquid and creamy.  It, like coconut oil, will solidify at temperatures under about 75 F, but can be gently heated to liquefy again.  If you make your own, use at least 2 cups of coconut to begin with so there's enough in the blender or bowl to puree.  This much will give you about 1 cup of coconut butter.  If you want other ideas on using this coconut butter, see here or the Tropical Traditions recipe blog, where they call it Coconut Cream Concentrate.

No-cook Honey-Sweetened Condensed (coconut) Milk
Makes about 14 ounces

2/3 c. honey (7 oz. by weight)
1/4 c. plus 1 Tbsp. water, warm but not hot
1/2 c. coconut butter (also known as coconut cream concentrate), warmed


Add the warm water and coconut cream to the liquid measuring cup you have the honey in. Whisk together.

Mixture will thicken as it cools to room temperature, but can be used right away.

To thicken faster, cover and put it in the fridge.

This can be used any way that you'd use regular sweetened condensed milk, EXCEPT in the no-bake cheesecakes that call for lemon juice.  It won't thicken up properly there, because the condensed (dairy) milk thickens by the lemon juice curdling it.  Coconut milk doesn't.

Try it with the Two-Minute Fudge recipe!
___________________
One tablespoon of this sweetened condensed milk contains 1g of fiber, 1g of protein, 7g fat, and 19g sugars.  The regular canned stuff has no fiber, 3g protein, 3g fat, and 22g sugar.

So this recipe is higher in fat, but it's a healthy fat.  It's lower in sugar, plus contains coconut fiber, which has shown an ability to reduce the glycemic load of foods by slowing glucose release.
0 Comments

Gluten-free, Dairy-Free German Chocolate Cake

10/23/2012

0 Comments

 
Picture
This weekend I participated in a moms' retreat- our own little 'Education Week'end, you might say. (See here for one of the addresses we heard.)
We each brought food for either the dinner or brunch the next day.  Most of the ladies there try to eat very healthfully, and some of them have dietary issues like gluten intolerance, so I made a gluten-free, dairy-free (CF= 'casein free'- the protein in milk) cake. 

I actually used a cake mix- Pamela's Gluten-Free Chocolate Cake Mix- which uses evaporated cane juice for the sugar, and organic grains.  That way everyone could eat happy.  Everybody- regular wheat-eaters included thought the cake was absolutely delicious.

By the way, this brand of cake mix makes two 8" or 9" layers.  Not all of the GF cakes mixes do.  Some, like Betty Crocker, only make one 8" layer.  So take that into consideration if you're pricing them.

GF CF German Chocolate Cake

Bake and cool one chocolate cake, using a two-layer sized gluten-free mix, or from scratch.  One good recipe is at Living Without.(This recipe calls for 1 c. coffee, to intensify the flavor- if you don't prefer to use coffee, use hot water instead and 1 Tbsp. molasses.  Reduce sugar by 1 Tbsp.)

Lower-fat, Dairy-free Coconut-Pecan Frosting (also egg-free) 
3 Tbsp. potato starch or tapioca starch, OR 5 Tbsp. rice flour
3/4  evaporated cane juice or brown sugar
1 c. coconut or rice milk
¼ c. coconut oil
¼ tsp. salt
1 Tbsp. vanilla
½ c. pecans, toasted and chopped fine
1 c. shredded sweetened coconut, toasted

Stir together starch and sugar, then gradually mix in milk.  Add coconut oil and salt, then heat and stir over medium-high.  Cook and stir until thickened and bubbling.  Remove from heat and stir in vanilla, pecans, and coconut, reserving 1 Tbsp each nuts and coconut for garnish.  Chill first if spreading on a tall cake, frost immediately if spreading on a sheet cake.
0 Comments

Creamy, Dairy-free Lime Silk Tartlets

7/13/2012

0 Comments

 
Picture
Or Lime Silk Pie.  Just put all the filling in an 8" pie crust.  The recipe is also gluten-free.  If you change the fruit to orange, and add cocoa powder, you get Chocolate Truffle Pie.

A friend recently sent me a very strange-sounding chocolate pie recipe, using avocados and coconut oil in the filling for some healthy fat.  It was so unusual I just had to try it!

It was shockingly good.  So good it deserved some variations. 

This one doesn't use cocoa at all, and takes advantage of the natural green color from the avocados.   

Are you intrigued yet?

Toasty Coconut Crust: (or use your favorite crust)
2 Tbsp. honey
½ c. coconut oil
1/4 tsp. sea salt
2 c. toasted fine-flake coconut

Pull out an 8” pie pan, OR for tartlets, line 30 mini-muffin tins with paper liners (optional, for easier removal).  Stir together the honey, coconut oil, and salt.  Add coconut and mix until smooth.  Press into the pie pan or muffin tins.  For the latter, use 1 Tbsp. per mini muffin tin and press.    Put in the freezer for 10 minutes, while you make the filling.  For easiest removal, take the mini crusts out of the pan (still in the liners) when firm, before adding the filling.

Filling:
2 avocados, about 4-5 oz. apiece
½ c. coconut oil
½ c. honey
½ c. fresh lime juice (or use the juice of 3 limes and make up the difference with water)
1 Tbsp. lime zest, or 6-8 drops lime essential oil
2 Tbsp. coconut cream concentrate (optional but softens the sharpness a little)
1 tsp. vanilla
1/8 tsp. salt

Put all the filling ingredients in a blender or food processor.  Puree until smooth.  Pour into your prepared crust.  Chill at least four hours, until firm.  (To speed it up, try 30 minutes in the freezer.)  Let sit at room temperature for 10 minutes if you want the filling a little softer.

Garnish with a dollop of coconut yogurt (or sour cream if dairy’s OK for you) and a bit of lime zest.    Makes one 8” pie or about 30 tartlets.


One website dedicated to avocado recipes - including both unique and stand-by recipes- is TheAmazingAvocado.com   

I'd love to hear back from you once you try this lime pie!

What else do you  do with avocados? 


0 Comments

Tropical Oatmeal for breakfast

1/18/2012

0 Comments

 
Picture
Oatmeal is a blank slate- nothing much to look at (or taste!) by itself, but it makes a great foundation!

I've been learning about coconut, and have decided it doesn't deserve the bad rap it sometimes gets.  Yes, it's high in fat, but it seems to be the kind of fat our body recognizes and can build with.  It's also very high in fiber.  If you look at coconut flour, which is defatted, ground & dried coconut, it has 6 grams of fiber in a 2 Tbsp serving (shredded coconut has 1/2 to 1/3 that amount).  Oat bran has only 2 grams of fiber in 2 Tbsp.  All that fiber helps reduce the glycemic load of whatever you're eating, in a major way.  This fiber is also a prebiotic, meaning it encourages good intestinal probiotic growth (good bacteria in your gut, necessary to break down food and assimilate vitamins and minerals).  
Some people have severe allergies with tree nuts, and coconut is now classified by the FDA as a tree nut.  So if you're allergic to almonds, does that mean you can't have coconut?  -Most likely you'll be fine.  Check with your doctor, but the few people who have been allergic to coconut are... just allergic to coconut, not other nuts.  See FoodAllergy.org for more info.

Here's a breakfast that is filling, with a fun flavor.  Adding the macadamias gives it an especially satisfying crunch.  You can double, triple, or otherwise multiply this recipe. 

Coconut-Lime Breakfast Oatmeal

1 c. coconut milk (water or milk is OK, too)
1/2 c. rolled oats
a dash of salt (1/16 tsp.)
1 tsp. lime or lemon juice, optional
2 Tbsp. shredded coconut
2 drops lime essential oil, or 1/2 tsp. lime zest
1/4 c. macadamia nuts, optional

Combine water, coconut cream concentrate, rolled oats, and the dash of salt.  Bring to a boil; simmer and stir for two minutes.  Remove from heat, then stir in juice, coconut, and essential oil or zest.  Top with macadamia nuts.  Drizzle with a little honey if you like, but I like it without.

If you use macaroon (fine flake) coconut, it will disappear into the oatmeal, leaving only flavor.  Using sweetened shredded coconut will both sweeten it and add a little texture.  My favorite is the shaved dried coconut; it adds both flavor and crunch.

Other flavor ideas:
Use pineapple, orange, or mango juice in place of part or all of the coconut milk  or water.
Or add fresh, frozen, canned, or dried pieces of pineapple, mango, or papaya
I don't know why it is, but pineapple and macadamias go together exceptionally well.  Coconut is a natural addition here.

0 Comments

Sweetened Condensed Milk and substitutes

11/4/2011

2 Comments

 
Picture
Most grocery stores start having 'baking sales' right about now.  I usually stock up for the coming year whle these baking ingredients are cheaper.  This year the sweetened condensed milk price hasn't been as low as usual. 

What can you use if you don't have sweetened condensed milk? (If you want one without dairy or table sugar, see here.)

While playing with it in recipes, I've learned a couple things about it.  One 14-ounce can is roughly the same as adding 1 cup of evaporated milk and 1 cup of granulated sugar (more accurate is 7 oz. evaporated milk and 7 oz- which is 1 cup- sugar).  You can also use half-and-half, whipping cream, coconut milk, coconut cream, or powdered milk mixed to double strength.  If you need it to be rich and are using powdered milk, add a couple tablespoons of butter.  Cream of coconut is a pretty good substitute; use the same amount.  Coconut cream is my favorite to use in this when cooking for dairy-sensitive people.  You can find it, and sometimes coconut milk powder (mix to double strength for coconut cream consistency), at Asian markets.    See photo at bottom of post.

Note-- Cream of coconut and coconut cream are NOT the same. Cream of coconut can be found with the drink mixers in any grocery store. It's made of coconut milk, sugar, and stabilizers.  Coconut cream is the thick liquid extracted by crushing or grinding coconut meat. -  I've found that this homemade "sweetened condensed coconut milk" does NOT set up in the no-bake cheesecake recipe.  The homemade stuff made with actual dairy does work.  I suspect it has something to do with dairy curdling- and coconut not- when mixed with citrus juice.

If your recipe is not going to be baked, as when you're making Two-Minute Fudge, stir together the milk and sugar, then bring it to a boil to dissolve the sugar crystals.  If the food you're making will be baked, the sugar will dissolve as the food cooks.

This substitute also works in reverse: when you have a recipe that calls for 1 cup milk/cream/half&half and 1 cup sugar, you can add a can of sweetened condensed milk!

To see how to make delicious thick apple-wedge-dipping caramel, see the instructions for Making Tres Leches Cake.  Just cook the sweetened condensed milk, don't add anything else to it.

Here's a recipe for sweetened condensed milk using powdered milk:

Sweetened Condensed Milk – for the closest version to a 14-oz can, use

1/2 c.  powdered milk*
1/2 c. water
1 c.  sugar
0-2 Tbsp. butter

 If you like to be precise, use 1 1/2 Tbsp. less than 1/2 c. water (this also gives a slightly thicker result, like the can), but the first way is very close (yields 14 3/4 oz)    Other recipes use more -or less- of any of those ingredients.  Really, they all work. That said, the 'closest' version costs $ .39 if you use no butter, and $ .53 if you use 2 Tbsp.  What a deal! One important thing to know- these recipes call for hot or boiling water so the sugar gets completely dissolved. Otherwise you get grainy condensed milk.  I usually put my sugar with the water, then microwave and stir until the sugar dissolves.  Then blend with the milk powder and butter.

For more recipes using powdered milk, see the post from 10/25/10

or the recipes from
The Wooden Spoon Cooking School.  For the class handouts for all the Wooden Spoon classes, see my Favorite Resources page.

*If you happen to have some old food storage powdered milk that is labeled 'instant,' check to see if the milk has larger particles.  If they're more the size of coarse sand than of dirt, the powdered milk is 'fluffier' in the measuring cup so you'll need to increase the powdered milk in this recipe to about 3/4 cup.
Picture
2 Comments
Forward>>

    Need a Search bar?
    One day I may upgrade my website-- but until then, use your web browser search bar. Type in my web address and what you're looking for, like this-- 
    www.theprovidenthomemaker.com  pumpkin --  and you should get results.


    Author

    I'm a disciple of Christ, a member of the Church of Jesus Christ of Latter-day Saints, a family-defending, homemaking, and homeschooling mom of eight children, two of whom sometimes can't have milk or wheat. Growing up on a farm in a high mountain valley, my parents taught me to 'make do', work hard, smile, and help others.  I love cooking, learning, growing food and flowers, picking tomatoes, and making gingerbread houses --which CAN be made allergy-friendly-- with my children.  I hope you find something to help you on my site!

    Archives

    April 2024
    July 2023
    April 2022
    September 2021
    March 2021
    December 2020
    April 2020
    March 2020
    February 2020
    January 2020
    December 2019
    November 2019
    October 2019
    September 2019
    August 2019
    July 2019
    June 2019
    May 2019
    April 2019
    January 2016
    November 2015
    October 2015
    September 2015
    March 2015
    February 2015
    November 2014
    October 2014
    September 2014
    August 2014
    July 2014
    June 2014
    May 2014
    April 2014
    March 2014
    February 2014
    January 2014
    December 2013
    November 2013
    October 2013
    September 2013
    August 2013
    July 2013
    June 2013
    May 2013
    April 2013
    March 2013
    February 2013
    January 2013
    December 2012
    November 2012
    October 2012
    September 2012
    August 2012
    July 2012
    June 2012
    May 2012
    April 2012
    March 2012
    February 2012
    January 2012
    December 2011
    November 2011
    October 2011
    September 2011
    August 2011
    July 2011
    June 2011
    May 2011
    April 2011
    March 2011
    February 2011
    January 2011
    December 2010
    November 2010
    October 2010
    September 2010

    Categories

    All
    Alcohol
    Alternate Cooking
    Appearances
    Apple
    Apricots
    April Fools
    Aprons
    Bananas
    Beans
    Beef
    Beets
    Bench
    Beverages
    Bonnet
    Bread
    Breakfast
    Budget
    Budgeting
    Cake
    Candy
    Canning
    Carrots
    Cheese
    Chicken
    Children
    Chocolate
    Christmas
    Cleaning
    Coconut
    Comfrey
    Common Core
    Constitution
    Cookbook
    Cookies
    Cooking Oil
    Crafts
    Dairy Substitutions
    Dehydrating
    Dessert
    Dried Fruit
    Earth Oven
    Earthquake
    Easter
    Edible Weeds
    Eggs
    Emergency Prep
    Essential Oils
    Faith
    Family Home Evening
    Fertilizing
    Food Storage
    Fourth Of July
    Freezer
    Frosting
    Fudge
    Garden
    Gardening
    Gingerbread
    Gluten
    Gluten Free
    Gold
    Government
    Grains
    Gratitude
    Hat
    Herbs
    Home Remedies
    Home Repairs
    Homeschool
    Home Storage
    Honey
    Hope
    Inflation
    Leftovers
    Legumes
    Lemon
    Main Dishes
    Mixes
    Mothers
    Noah
    Non Artificial Colors
    Non-artificial Colors
    Nuts
    Oats
    Oil
    Orange
    Paint
    Peaches
    Pear
    Pie
    Pizza
    Plums
    Poem
    Popcorn
    Pork
    Potatoes
    Powdered Milk
    Prayer
    Preparedness
    Projects
    Prophecy
    Pruning
    Pumpkin
    Quick Bread
    Rhubarb
    Rice
    Salad
    Salt
    Sauces
    Self Reliance
    Self-reliance
    Sewing
    Shelf Life
    Shelves
    Sky
    Smoothie
    Snacks
    Soup
    Spices Or Seasonings
    Squash
    Strawberries
    Substitutions
    Sugar
    Summer Fun
    Three Month Supply
    Time
    Tomatoes
    Trees
    Truffles
    T-shirts
    Tuna
    Ultra Gel
    Valentine\'s Day
    Vegetables
    Water
    Watermelon
    Wheat
    Work
    Year Supply
    Zucchini

    RSS Feed

Web Hosting by iPage